Wednesday, November 17, 2010

Exciting News!!!!!!!

Good news the Unconventional Kitchen is moving to a website!!! It is still bare bones, but we are working on importing all of recipes into the website and the blog. I am hoping in the next couple of weeks it will be done. Go check out the website www.unconventionalkitchen.com!

Other big news I am having a GIRL!!!!!!

Thursday, November 4, 2010

Gluten Free Pumpkin Cornbread


I always look forward to pumpkin baked goods in the fall. I love pumpkin bread, cookies, granola, and the list goes on. I saw a recipe recently for pumpkin cornbread and thought I would give it a whirl. I adapted it to be gluten free and a little more healthy. It turned out to be a keeper to add to my other favorite pumpkin treats. This cornbread tastes best hot out of the oven with a little cinnamon honey butter. It also pairs really well with soup, and chili.

Gluten Free Pumpkin Cornbread
1 C cornmeal
1 C gluten free flour mix, or soft white wheat (1/3 C almond flour, 1/3 C sorghum, 3 T tapioca starch, 3T brown rice flour)****
1 T baking powder
1 tsp sea salt
1/2 tsp cinnamon
1/4 tsp ginger
1/2 C sucanat, or brown sugar

1 T molasses
2 eggs
1 C pumpkin puree
1/4 C grape seed oil, or olive oil


1. Preheat oven to 400 degrees, put greased 8x8 pan in the oven while it is preheating
2. Sift dry ingredients together
3. Mix wet ingredients together
4. Mix both together, being careful not to over mix the batter.
5. Pull glass baking dish out of oven, careful it is HOT
6. Pour batter into the hot dish (this makes a great crust) and pop it in the oven
7. Bake 30 minutes, or until toothpick inserted comes out clean
8. Serve with soup or honey butter, or both

***I try to cut back the starch in baked goods as much as possible, but to make it simpler you could just put 1/3 C tapioca starch in, and omit the brown rice flour


Cinnamon Honey Butter

1/4 C butter
1/4 C pure honey
1/4 tsp cinnamon

Whip all of these ingredients together with egg beaters. Spread it on hot pumpkin cornbread straight out of the oven and ENJOY!!
Posted by Picasa

Tuesday, November 2, 2010

Gluten Free Pumpkin Cornbread


1 C cornmeal
1 C gluten free flour mix, or soft white wheat (1/3 C almond flour, 1/3 C sorghum, 3 T tapioca starch, 3T brown rice flour)****
1 T baking powder
1 tsp sea salt
1/2 tsp cinnamon
1/4 tsp ginger
1/2 C sucanat, or brown sugar

1 T molasses
2 eggs
1 C pumpkin puree
1/4 C grape seed oil, or olive oil


1. Preheat oven to 400 degrees, put greased 8x8 pan in the oven while it is preheating
2. Sift dry ingredients together
3. Mix wet ingredients together
4. Mix both together, being careful not to over mix the batter.
5. Pull glass baking dish out of oven, careful it is HOT
6. Pour batter into the hot dish (this makes a great crust) and pop it in the oven
7. Bake 30 minutes, or until toothpick inserted comes out clean
8. Serve with soup or honey butter, or both

***I try to cut back the starch in baked goods as much as possible, but to make it simpler you could just put 1/3 C tapioca starch in, and omit the brown rice flour

Sunday, October 31, 2010

Winco Bananas for 18 cents!!!

If you want to save money making green smoothies, go to Winco!!
Winco just advertised 18 cents a pound for bananas at the Orem location!!! I am not sure if that is for every location, but that is a really good deal. I love bananas in my green smoothies and never make one without, it makes them creamier and sweeter.

Tip for using the bananas in green smoothies:
1.Buy up all the bananas they will let you on the sale, take them home.
2. Wait till they are ripe and sweet.
3. Once fully ripe, peel them, break them in half, and put them on a cookie tray.
4. Freeze in the freezer.
5. Put the frozen bananas in zip loc baggies and store then in the freezer.
6. Use them up for creamy green smoothies.

Friday, October 22, 2010

Roasted Tomato Soup
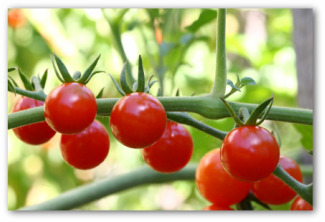


Sorry no picture of the soup, but this soup is worth the post, picture or not!!!

This recipe was given to me by my sister in law, thanks so much Alyce, it is definitely a keeper!!! This soup is perfect for those cold days that are coming our way. Roasting the tomatoes gives it a whole new flavor that is incredible, and the basil just makes it even better. The thing that I loved most about this soup is that I was able to use up all of the tomatoes from my garden. I made a double batch and froze half of it to use on a day when I don't have time to make dinner.

Notes while making the soup:

When I was making the soup I didn't have time to let it cook for 40 more minutes, so I blended it right after I added the tomatoes, and then simmered it while we where eating. I also think to make this soup a little less rich you could add 1 T of butter and olive oil instead of 2.

Roasted Tomato Soup

3 lbs tomatoes
1/4 C olive oil--(this part I didn't measure I just tossed the tomatoes in olive oil)
1 T kosher salt-- (this part I didn't measure either again I just salted and peppered the tomatoes)
1 1/2 teaspoon ground black pepper " "
2 cups chopped yellow onion
6 garlic cloves
2 T butter (you could use more olive oil if you like) ( I think you could easily do 1 T of olive oil and butter)
2T olive oil
1/4 tsp red pepper
1 28 oz can of tomatoes with juice
4 C fresh basil ( I only had two)
1 tsp fresh thyme
1 qt chicken stock (vegetable stock would work as well)

1. Preheat the oven to 400 degrees.
2. Toss the tomatoes in the olive oil, salt, and pepper.
3. Spread on a cookie sheet in one layer not overlapping and roast for 45 minutes.

4. While the tomatoes are roasting, add 2 T olive oil, and the butter to a large stock pot.
5. Melt the butter over medium heat.
6. Once the butter is melted add the onions, garlic, and red pepper to the pot, cook until the onions turn a light brown.
7. Add the canned tomatoes, basil, thyme, and chicken stock.
8. Add the oven roasted tomatoes including the juices on the cookie sheet.
9. Bring to a boil and simmer for 40 minutes.
10. When it is done cooking, blend in batches so that the soup is still chunky but more smooth. I just pulsed mine in the blender instead of blending it all the way.
11. Season to taste, and ENJOY..

This soup freezes well, so as long as you are going to spend the time making it, it makes sense to double it and freeze some for later.

Tuesday, October 5, 2010

Whole Grain Cinnamon Banana Cake with Gluten Free Version

Wow. These little cakes are really tasty. Shocking enough they have NO oil or butter in them, making them a lot better for you than most cakes. Trust me they don't need it, the bananas in the cupcakes make them really moist, and more then make up for the lack of fat. Along with being "healthyish" they taste really good.
I made the cake for Isaiah's second birthday party. It was adapted from Two Peas and Their Pod's recipe. I mainly just changed the flour to be whole grain flour, and the sweetener to be turbindao sugar instead of refined sugar. In the future I will experiment with agave in this recipe. You can see that the cake in the pictures is frosted, but the cake doesn't need frosting. Since it was a birthday cake I wanted to decorate it, so I frosted it with a light whip cream frosting. If you do end up frosting the cake, omit the topping.

My next project with this recipe is to make it with agave. Truthfully I am still out of it. I ran out of it making the raspberry jam, and being pregnant and tired, didn't make the effort to go get it. You will be happy to know I have picked up a gallon FINALLY.


Banana Cinnamon Cake

3 ripe bannanas mashed
2 large eggs
1 tsp vanilla
1 C turbinado sugar or raw sugar
1 3/4 C whole grain flour blend**( equal parts, spelt, brown rice, and barley)
1 tsp baking soda
2 tsp cinnamon
1 C cinnamon chips*
Topping:
3 T turbinado sugar
1/4 tsp cinnamon
1. Mash the bananans well with a fork in a big bowl.
2.Add in the vanilla and both of the eggs. Stir the mixture until the eggs are fully incoporated.
3. Add in the flour, baking soda, turbinado, and cinnamon. Carefully mix all of the ingredients together.
4. In a seperate bowl add 3/4 C of the cinnamon chips, reserving the rest for the topping. Toss them with 2 T whole grain flour. This helps them so they don't all sink to the bottom and are evenly dispersed throughout the batter.
5. Fold in the cinnamon chips.
6.Pour batter into baking dish. Top with the cinnamon sugar mixture and remaining cinnamon chips. Bake for 35-40 minutes, or until a toothpick inserted in the middle comes out clean.

* I found the cinnamon chips at Harmon's

To make this completely gluten free:
Sub out the whole grain flour mix, (which is a mix that is low in gluten, I have found that I am able to tolerate it, in small amounts) and add
1/2 C almond flour
1/2 C sorghum flour
1/4 C tapioca
1/4 C cornstarch
1 scant teaspoon xantham gum

Tuesday, September 28, 2010

Dinner in 20 Minutes, Fresh Mozzarella and Heirloom Tomato Pizza

This meal is a life saver on a busy day, margherita pizza, with garden tomatoes, and fresh mozzerella. It is quick, easy, and everyone loves it. The secret to making this dinner so fast and easy is buying the pizza crust at California Pizza Kitchen. They sell their dough already rolled out for you for ONE DOLLAR. They are smaller pizzas so I normally buy two. In fact I actually just bought six last time and froze the extras for when I need to take a meal to someone, or for a quick weeknight dinner. I always buy the whole wheat multi grain dough, they have wheat or white, because the dough is still light and better for you. Making your own pizza dough would be even better for you, but this is one of those meals in a pinch.
It is hard to tell from these pictures what is on this pizza. What you are looking at is yellow and red hierloom tomatoes from Jacobs Cove Farm, which is an amazing place, they grow so many different varieties of organic tomatoes.
Here is what the crust comes like, already rolled out for you, and ready to go.


Fresh Tomato and Mozzerella Pizza

Caifornia Pizza Kitchen Multigrain dough
Red Sauce
Fresh Mozzerella
Garden Tomatoes
Fresh Basil
Parmesan

1. Spread the sauce on, then top with thinly sliced cheese, and next the tomatoes.
2. Sprinkle on chopped basil, salt and pepper, and a little parmesan on top.
3. I baked mine in a 400 degree oven on a pizza stone for about 15 minutes.

To Make This Gluten Free

I top a portobella mushroom with sauce, toppings, and cheese wrap it in tinfoil and bake it at the same temperature until the mushroom is soft. Then take off the tinfoil and broil the mushroom to melt the cheese.

Or take your favorite gluten free pizza dough and follow the directions above

Thursday, September 23, 2010

The Best Light Corn Chowder


This soup hit home, after a VERY long day. The day started off on a bad foot when Isaiah pooped in the tub. I don't know if you have ever had a child poop in the tub, sorry very unappetizing when talking about food, but it was one of those moments that you look around wishing someone else was the mom to step in. The rest of the day included a really fun tantrum at the grocery store and a few meltdowns, on both ends. I wish I could say I never loose my cool, but there are moments, I have to remind myself that I am the mom, when I would love to throw my own tantrum. What does this have to do with soup?? Lets just say food has more than one purpose, than just to stave off hunger pangs. Food can be incredibly comforting and a good pick me up. This soup hit home. It is so creamy, while being surprisingly light for the normal chowder recipes that calls for 2 c heavy cream and a half a pound of bacon. It only calls for a cup of half and half, and one piece of bacon, which I just got in the meat section, instead of buying a whole pack of bacon for one piece. Scottie's response after trying it was, "did you write down the recipe". Often times I can't remember how I got to the end result. Luckily I wrote it down. He loved it, and so did my in laws who came for dinner.

The Best Light Corn Chowder
adapted from Cooks Illustrated

10 ears of fresh corn
1 piece of bacon (optional)
1 large onion
2 cloves of garlic
3 T flour, I used a gluten free flour blend
3 C chicken broth
4 medium red potatoes (scrubbed and cut in 1/4 inch pieces)
1 bay leave
1 tsp minced fresh thyme, or 1/4 tsp dry
1/2 C milk*
1 C half and half*
2 T parsley
1 pinch of sugar
Salt and pepper to taste


1. Cut all of the corn off the cob and reserve about 4 ears of it.
2. Cook the piece of bacon until crisp.
3. Add the onion and a 1/2 tsp salt. Cover and cook in the oil, until the onion is soft 8-10 minutes.
4. Once the onion is cooked through, add the minced garlic, cook until fragrant ( about 30 seconds).
5. Add the flour and stir constantly for 2 minutes.
6. Whisk in the chicken broth.
7.Stir in the half and half, thyme, potatoes, 3/4's of the corn, bay leaf, and milk.
5. Bring to a boil, and then reduce to a simmer for10 minutes or until the potatoes are tender.
6. Take out half of the mixture and blend it, then stir it back into the soup.
6. Stir in reserved corn kernels and cook until they are tender yet still a little firm, about 5 minutes.
7. Discard bay leaf, take off of stove and season with salt and pepper to taste. Stir in chopped parsley.

*Note: I used rice dream instead of milk, because that is what we normally drink. It gave it a slightly sweet flavor that I liked. Rice milk is thinner than 2% milk so I had to compensate and add a cup of half and half. If you use 2% milk you could reduce the half and half to a 1/2 C ,and add a 1C of milk instead.

Whole Grain Banana Pancakes

(Picture taken from Our Best Bites)

Lets just say you will missing out if you don't make these. These are probably the best pancakes I have had. I made extra of these to freeze some, and not one made it to the freezer. Everyone that walked through the kitchen couldn't help grab one and dip it in the peanut butter syrup. Don't skip the peanut butter syrup it makes these pancakes. The whole grain flour blend makes these light and fluffy, but if you don't have a grinder to make the whole grain flour, try white wheat flour. They might be a little heavier with wheat flour.

Whole Grain Banana Pancakes with Peanut Butter Maple Syrup
adapted from Our Best Bites

1 3/4 C whole grain flour (equal parts spelt, brown rice, and barley)
3 T sucanat ( a natural sugar, or try your sweetener of choice)
2 tsp baking powder
1 1/2 tsp baking soda
1/4 tsp salt
1 1/2 C low fat buttermilk
1 tsp vanilla
1 T melted coconut oil
1 large egg
2 medium small bananas

1. Combine flours, sucanat, baking powder, baking soda, and salt in a mixing bowl.

2. In a separate bowl combine the liquid ingredients; buttermilk, vanilla, egg, and melted coconut oil.

3. Add the wet ingredients into the dry mix and mix until just combined. Don't over mix. You should still see small streaks of flour in the batter.

4. Place bananas in a separate bowl and roughly mash with a fork. Fold into batter.

5. Cook on a cast iron skillet, or a hot griddle. This batter is a little thicker so would drop a 1/4 cup on the skillet and then smooth them out. Flip one bubbles appear and pop.

Note: In the original recipe she adds chocolate chips, personally I think they are plenty sweet without, but if you are feeling really decadent go for it.

Syrup:

1 C real maple syrup (not the aunt jemima stuff)
1/2 C peanut butter

Melt the two together over the stove until incorporated. Pour over pancakes and ENJOY!

Tuesday, September 21, 2010

How To Make Whole Grain Flour


Step 1:
You need a good grain grinder. I use Blendtec's Kitchen Mill. I personally love it, but I know there are a lot of other good grinders out there. Do your homework, and pick one. They will run you about 100-200 dollars. Or to save money check on KSL and get a used one. It is worth the investment. Fresh flour produces better, more nutritious, baked goods. A grinder makes it possible to use a lot of different flours and flour blends you can't find in the store, making it easier to get more whole grains in your diet.

Step 2:
Buy your grains. That you are going to make into flour. I buy all of these in big 50 pound bags through grainmix.com, and alpine food storage. To start out making flour I bought the grains in smaller quantities in the bulk section at Good Earth, a local health food store. Buying them in smaller quantities allows you to try them first and see what you like best.

The blend that I have been using lately, and produces wonderful results is: equal parts brown rice, barley, and spelt.

Step 3:

Once you have your grains you are ready to make flour! You will need a big bowl to mix the grains in. Measure into the bowl equal parts brown rice, barley, and spelt. Depending on how big of a batch of flour you want to make varies how many cups of each you will measure out. Mix the grains together, and then grind them according to your grinders instructions.

Step4:

Use it all up at once, or store the flour in the freezer for a longer shelf life. I like to grind extra so that I have some on hand.

Monday, September 13, 2010

5 Minute Raspberry Jam


Isaiah, Nancy, and I spent a wonderful afternoon picking raspberries at a local berry farm. They were only 2 dollars a pound!! I found the farm on u pick a great website that has a list of different farms that sell their produce already picked, or you can pick your own fruit and save a lot of money. Not to mention it is the freshest you will get it, and most times organic.

Isaiah probably ate a pound of berries himself, "helping" mommy pick them. If you haven't tried a u pick, you should it is a lot of fun, and good for kids to understand how food is grown. With a couple of the pounds I picked I decided to make jam. This has been my go to recipe for jam because it takes 5 minutes and you don't have to cook it preserving the nutrients of the fruit. The jam also has more flavor because it hasn't been cooked out.
My secret weapon to make the quickest jam possible, ultra gel. If you have not heard of ultra gel it will soon become your best friend in the kitchen. The reason I like ultra gel for making jam is the obvious it takes five minutes.
What I like about ultra gel:
  • It doesn't require cooking to thicken whatever you are making

  • You don't have to make a slurry to add it to soups, or other things

  • It has no taste

  • It is gluten free

  • It will keep whip cream from separating

  • You can make ranch dressing without the mayonnaise, or with a lot less for a thicker dressing

  • You can add it to ice creams that are lower fat and they won't crystallize

Wow this sounds like a paid advertisement or commercial. Which I assure you no one is paying me to use their products, not that I would mind that. But I just had to let you in on my little secret to 5 minute jam.


Five Minute Raspberry Jam

4 Cups Raspberries

1 C agave

1 1/2 C sugar

1/2 C ultra gel

2 T lemon juice ( I added a little more, because I like it a little tart)
Mash the raspberries, agave, lemon juice, and sugar. Gradually stir in the ultra gel. It will start to thicken immediately. Package, label, and date. Store in freezer for six months.

**Next time I will try all agave, truthfully I ran out, and I was worried about the consistency

**I have used this recipe with strawberries and it is equally good, but I cut out a half cup of sugar because strawberries are sweeter

Thursday, September 9, 2010

Zucchini Fries

This summer has been a blur of vacations, mostly warm days, and squeezing every last drop of sunlight out of a full day. I must admit I am so sad to see it go it went by too quickly. I think I will have to ease into cooler weather with hikes in autumn leaves, and pumpkin bread. One perk to the end of summer is that all of the fresh produce from the garden is at its peak. Zucchinis are in abundance! Crazy enough I picked up a free one the size of my arm on the side of the road. Someone had left a card table with all of their excess produce with a sign that said free. Way to give back!
I came across this recipe on a wonderful blog, named Two Peas and their Pod. I was happy to find this recipe because I have days of zucchini and we were having my in laws over for dinner. The verdict on the fries, they were a big hit, I followed the recipe to a T, so I will just provide a link to the recipe. We had the fries along with Fresh Heirloom Tomato and Mozzarella Pizza, I will post that recipe next.


Thursday, August 19, 2010

Roasted Ratatouli Pasta

Drum roll please..... the mystery dish is Roasted Ratatouille pasta. You might have had ratatouille before, but roasting the eggplant and squash brings out a whole new dimension of flavor. My inspiration for this pasta came from two different Cooks Illustrated recipes, to the original recipes I added summer squash instead of zuchinni, red pepper, and tossed it with pasta. This would be equally good served over polenta, or just by itself as a side dish.
This first step. Salting the eggplant and letting it sit in a colander to sweat. (literally the eggplant sweats out little beads of water)
I chopped up all of the veggies while I was waiting for the eggplant to sweat.

Here is the end results. I bet you can't wait for the recipe......................

I threw in this picture just to make you smile.

Posted by Picasa
Ingredients

2 large eggplants (about 2 1/2 lbs), cut into 1-inch cubes
2 large summer squash (about 1 1/2 lbs), scrubbed and cut into 1-inch cubes (or zuchinni)
1 red pepper, seeded and diced
1/4 cup olive oil
1 large onion , chopped
2 medium cloves garlic , minced
3 medium tomatoes (ripe), about 1 1/2 pounds, cut into 2-inch cubes
1/4 C chopped basil
Ground black pepper
Sea Salt
Gluten Free Noodles ( I used Trader Joes brown rice pasta)
Parmesan Cheese (optional)
Instructions
1. Place eggplant in large colander set over large bowl; sprinkle with 2 teaspoons salt and toss to distribute salt evenly. Let eggplant stand at least 1 hour or up to 3 hours. Rinse eggplant well under running water to remove salt and spread the egg plant on a layer of paper towels; cover with another stack of paper towels. Press firmly on eggplant until eggplant is dry and feels firm and compressed.
2. Adjust oven racks to upper-middle position and the second rack to lower-middle position; heat oven to 500 degrees. Line 2 rimmed baking sheets with foil.
3. Toss eggplant, summer squash and 2 tablespoons oil together in large bowl, then divide evenly on baking sheets. Sprinkle with salt and roast, stirring every 10 minutes, until well-browned and tender, about 30 to 40 minutes.
4. Heat remaining 2 tablespoons oil in heavy-bottomed pan ( I used my cast iron pot) over medium heat until shimmering. Add onion, and red pepper; reduce heat to medium-low and cook, stirring frequently, until softened and golden brown, 15 to 20 minutes. Stir in garlic and cook until fragrant, about 30 seconds. Add tomatoes and cook until they release their juices and begin to break down, about 5 minutes. Add roasted eggplant and zucchini, stirring gently but thoroughly to combine, and cook until just heated through, about 5 minutes. Stir in basil; adjust seasonings with salt and pepper and serve.
5. While you are cooking the sauce, cook the pasta according to package directions
6. Toss the sauce with the hot pasta and garnish with freshly grated parmesan cheese.
Note: I took this dinner to three different families, so to make it strech farther, I tossed the noodles with a little bit of good quality jarred spaghetti sauce and then the roasted ratatouille. If you are just feeding your family the ratatouille has a lot of flavor and would completley cover the pasta.

Tuesday, August 17, 2010

Eggplant Surpirse

My sweetest neighbors brought over these lovely eggplants that she has grown in her massive garden. She said that other than breading them and frying them she doesn't know what to do with so many eggplants. I told her that I would make her one of my favorite recipes with eggplant. Almost all the ingredients were from her garden, fresh eggplants, summer squash, tomatoes, and basil......can you guess what I made?? Unfortunately she wasn't feeling well because of the last cancer treatment and wasn't able to make it to dinner. So I brought dinner to them, she loved it and wanted the recipe. Marylin this is for you, something different to do with eggplant....

As soon as you guess what it is I will post it. Or maybe a little sooner if it doesn't get guessed quickly.

If you have a favorite eggplant recipe let me know. Marylin and I would love to try some new recipes with the abundance of eggplant that she has.
Posted by Picasa

Pics from the Farmers Market and Summer Quinoa Salad

Isaiah loving the market, sampling the bread, and wearing his sweet shades he would not part with at DI.

The summer quinoa salad that I posted the recipe for underneath. Sorry the lighting is horrible, taking pictures when it is dark never lends to very pretty food pics.
Posted by Picasa

Monday, August 16, 2010

Scotty's Bday Continued, and Summer Berry Trifle

Wow this post is long in coming, but better late than never.......
More birthday fun at the Rooster, a local restaurant in Utah. I had a hard time finding gluten free options at the Rooster, but if you aren't gluten intolerant they did have quite a few veggie noodle dishes that looked really good.
For Scottie's birthday I made him a strawberry, brownie, trifle. It seems to me theres is a reoccurring theme here, with celebrations and whip cream. I realized from the previous posts that whip cream usually makes its way into the party.

Posted by Picasa

Summer Berry Trifle

Strawberries, raspberries, really whatever berry is in season
Agave whip cream (recipe below)
Gluten Free Brownies

In a glass serving dish, layer first with the brownies, then the whip cream, and then berries. On the last layer end with whip cream and put a few berries on top for decoration. I also added some dark chocolate curls, that I made with a vegetable peeler and a dark chocolate bar. Just run the peeler along the edge of the chocolate bar, and it makes cute little curls. It looks super fancy, but takes fives seconds to do.

Agave Whip Cream

2 C heavy cream
3 T agave
1 T vanilla
In a mixer whip the cream, agave, and vanilla for 2-3 minutes until you can make peaks with the whip cream. Be careful not to overmix or you will have butter instead. When it looks like the whip cream is getting close I turn the mixer down to the lowest speed and mix it until it is done, to avoid making homemade butter!

****For sake of time, I did a gluten free boxed mix. I used the trader joe's gluten free brownies. They have decent ingredients, and are mostly starch free, but the best part is they taste good. If you want to make this trifle even better make these brownies. Gluten Free Brownies

Scotty's Bday and Good Eats

The last two birthday celebrations for Scotty have consisted of mountain biking in Park City and going to dinner. The trails in Park City are always fun, but we really lucked out with dinner this time. We ended up going to Reef's Kitchen, a Medeteranian restaurant owned by a family from Jerusalem. The dad, and daughter wait tables, and the family cooks. It is authentic, homey, and SO good. It also has a gluten free menu which is a big plus. We ended up getting the salmon cooked in this fabulous sauce, which by the way is on Salt Lakes top 50 things that you must do, I can vouch for that it is a must do. We also ordered the hummus, with pita (they gave me veggies for the gluten free option), lentils and rice, fries, and the most amazing hebal tea, I think it was cardamom. The waiter was surprised that we finished all of the food, just the two of us, but the meal was so balanced, flavorful, and good that we devoured it.
The restuarant itself is kind of pricey, I guess everything in Park City is, so to make it affordable do what we did. I got a gift certificate to Reef's Kitchen on restaurant.com. The gift certificate was good for 25.00 and it only cost me around 3 DOLLARS!!! Restaurant.com is a great sight, but you have to wait for when the gift certificates go on sale for 80% off and read all of the stipulations with each restaurant. At Reef's Kitchen you had to spend 35 dollars on the 25 dollar gift certificate, which was easy to do. All in all our meal ended up costing us around 15 dollars plus tip, and it was one of the better meals I have ever had, which is saying alot.
Biking in Park City, I wish it was closer so that we could do those trails more often. They are so well groomed and packed down, that it makes for a really fun ride. Plus they link onto so many trails that you can go forever.

Posted by Picasa

Saturday, August 14, 2010

Farmers Market

I went to the farmers market today, and I am kicking myself that I haven't made it there more often this summer. The produce was amazing and surprisingly affordable. I got a huge summer squash fro 50 cents, a cucumber for 25 cents, a bunch of carrots for a dollar, and peaches for 25 cents each. I am definitely going to go back next week for a cantaloupe one farmer promised me. I took a gardening class and he said that cantaloupes unlike some other fruits don't keep ripening once they are picked. He said that the time of peak sweetness is when they are fully ripe on the vine. I have never had the luxury of having a cantaloupe that was completely ripe before it was picked. I am sure the cantaloupe in the grocery store is picked weeks before it get boughten. Anyway, I will report back next week on my cantaloupe experience, I can't wait!
As for the produce I bought, I made a simple dinner with the summer squash, broccoli, and fresh tomatoes from my neighbors massive garden. It was simple, but really good and fresh.

Not really a recipe but I will explain how I made it:


1 summer squash
1/2 head of broccoli
1 lemon
Fresh tomatoes, from the garden
herbamare, or sea salt would do
pepper


Chop up the summer squash and broccoli. Squeeze the lime juice over it and cook until still crisp but cooked through. Season with herbamare and pepper. Serve over hot quinoa. Add chopped tomatoes on top, and just for kicks some grated Parmesan cheese. Enjoy!


Quinoa


1 C quinoa
1 1/2 C broth, chicken or veggie, or just plain boring water


Rinse the quinoa in a fine mesh strainer, to take off the saponin a bitter coating that keeps the birds from eating it. Bring the broth to a boil, add the quinoa and cook until the quinoa is soft, about 15 minutes. Easier than rice, and in my humble opinion way better.

Thursday, July 29, 2010

Pesto Quinoa Salad with Roasted Red Peppers and Broccoli

1/2 C pest
1 bunch broccoli
2 roasted red peppers (see explanation how below, or buy jarred)
1 C cooked garbanzo beans
2 1/2 C quinoa
4 C water, or broth
1 t. salt

1. Add the quinoa, water and salt, to a medium size sauce pan. Bring to a boil, and then simmer for 15-20 minutes, or until tender.

2. Meanwhile, cut the broccoli into little florets. Lightly steam them in salted boiling water, so that they are bright green and slightly crunchy. Once done, drain the broccoli and run cold water over it.

3. Take the quinoa off the stove and let it cool. Once the quinoa is compelety cool, add the pesto, garbanzo beans, broccoli, and red peppers.

4. Toss to coat well, enjoy!

Thursday, July 22, 2010

Blend Tec Tamper What You Have All Been Waiting For


This post is for you wonderful ladies’ question, who I met last night in Melissa's cooking class: Where to get a Blendtec tamper. Before I answer that question, I just want to put in a plug for Melissa's cooking classes. It was so fun! She did a healthy desserts class, and all of the desserts were fabulous, fast, and GOOD FOR YOU!! She is teaching more classes at Jacobs Farm. They are a great deal and worth attending to learn how to cook with seasonal fresh foods. The link to her website is rawmelissa.com. I will have to make her apple crisp and post about it because it is that good. She doesn't cook it, which saves time, making it fresher and better for you.

Ok, on to the question......

It might be blasphemous to even say there was something that I didn't like about my Blendtec, because it is my FAVORITE thing in the kitchen, but the first couple of days I owned it I almost returned it because of the lack of a tamper. I shredded a few spatulas trying to make hummus and peanut butter and almost threw in the towel with the pricey appliance, but then I found this tamper and my love affair with the blender began. I can't find the exact place I got mine, but this is the same thing that I have, just a different company. The website is http://www.3blenders.com/BlendtecAccessories.html. The tamper is just a wooden dowel, with a small wooden cross bar that fits the blender perfectly so you can push stuff down without hitting the blade. It costs $8.75. You could probably make one really easy, but if you want to save time just buy one of these babies. It is worth it!

Monday, June 28, 2010

Mexican Frittata

My mom’s neighbor has a chicken coop and sells a dozen organic free range eggs for 2 dollars! Every time we visit I try to pick up some eggs. This was the quick breakfast that I made from these little beauties. It really is simple, and I hesitated posting it because it is so simple, but sometimes it is nice to have just the everyday quick easy, no fuss meal. It made enough for the three of us for Sunday breakfast, but if you aren't big eaters it makes great leftovers.

10 egg whites or 5 whole eggs

1 anahiem pepper

1 red pepper

1 onion

salt and pepper to taste (about a 1/4 teaspoon salt, and a few grinds of pepper)

Garnish: cilantro, salsa

Dice the onions, and peppers. Heat a medium fry pan, add a tsp of olive oil. When the oil is hot add the onions and peppers. Cook until soft, about 5 minutes. In a separate bowl add the egg whites and salt and pepper and mix together. Pour the eggs over the peppers and onion and mix them together. At this point don't touch the egg mixture, just let it cook. When it is almost all the way cooked through, (the sides are cooked, and everything but the very center is cooked), put it in the oven on high broil and cook the rest of the way through. Watch it so it doesn't burn! It should be a golden brown on top. Take out of the oven and slice like a pizza. Top with salsa, and cilantro.


Not Your Oridnary Apple Sauce

I picked up this applesauce at Target on clearance to give it a try. Boy was I pleasantly surprised! It is all naturally sweetened with fruit juice and without preservatives. The biggest thing that stands out for this apple sauce is that it is chunky, almost like eating apple pie. In fact it would make a great pie filling, tart filling, topping for pancakes, or just eat it straight out of the bottle with a spoon, which is what I did. I thought I would write more about good finds to have on hand, because let's face it we don't always have time to make everything from scratch, and in those cases it is nice to have healthy alternatives.

Sunday, June 20, 2010

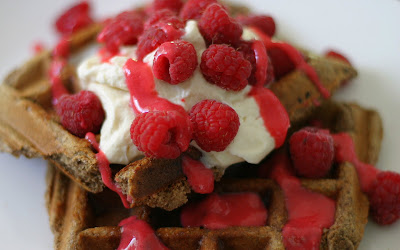
Whole Grain Buttermilk Waffles and Raspberry Sauce

Happy Fathers Day, Scotty!! Here is one of my Fathers Day gifts for my sweet husband, breakfast in bed. I chose waffles, whip cream, and berries, for Scottie's sweet tooth. I don't normally like to use a lot of dairy when cooking, but I made an exception for Fathers Day. The waffles had a yummy whole grain taste, that paired well with the light whip cream, and raspberry sauce. The waffles are really good, but a bit heavy, I think I will play around with the recipe a little bit more to get it perfect.

I added chia seeds and flax instead of eggs. I just taught a class for UVU, and we talked about chia seeds and how good they are for you so I decided to try them in this recipe. I have used chia seeds in breads and granola bars, and other baked goods and they make baked products rise and make them moist. Chia seeds are so good for you. They have more omega 3's than salmon, and more anti oxidants than blue berries. They also keep you hydrated longer because they asorb water in your body. Athletes use them for endurance.

I didn't cook the sauce to give the meal live enzymes to help digest the waffles. That is something I have been trying to do with all of my meals. Make sure that every meal has something not cooked to help with live enzymes necessary to digest food.


Here they are in bed, Isaiah with Daddy eating his waffles. He is so cute, whenever he takes a bite of something he likes he says, mmmm.
Posted by PicasaHis jammies say handsome like daddy, which is SO true!!


Whole Grain Waffles
These waffles are pretty thick, if you want a thinner waffle, add more liquid to the batter. If you don't have flax and chia seeds, go ahead and add 2 eggs in the batter.

Whisk together dry ingredients in a bowl:
2 C whole grain flour ( I used 1 C teff, 1 C oat, but 2 C whole wheat would work just fine)
3/4 tsp salt
1/2 tsp baking soda
1/2 C buttermilk powder*

Wet ingredients:
2 T flax or chia seeds ( or 2 eggs)
1 3/4-2 C water
1/4 tsp vanilla
1/2 C plain yogurt
2 tsp agave
2 T olive oil

Combine the chia seeds and flax in a blender with the water. Let them sit while you add and whisk the dry ingredients. Once you are done with the dry ingredients, add the vanilla and yogurt to the blender. Blend all of the ingredients well. Mix together the wet and dry ingredients until just combined. The waffle batter is pretty thick, if you want a thinner batter add more liquid. Add the batter to a hot waffle maker, and spread it out (it is thick). Cook a little longer than the waffle machine says to ensure it is cooked all the way through. Top with whip cream and berry sauce.
*You can find buttermilk powder in the baking aisle. If you don't have buttermilk powder you could substitute 1 3/4-2 C of buttermilk instead of water. Or to cut out the dairy you could add 1 3/4 C nut milk and 1 1/2 T vinegar.

Agave Whip Cream
1 C whipping cream
2T agave
1/2 tsp vanilla
Combine the whip cream agave and vanilla in a cold metal bowl. Whip with a hand held beater until the cream makes stiff peaks.

Berry Sauce
3 C raspberries
1 tsp lemon juice
1/4 C agave
Blend until smooth. You need a high powered blender for this to break down the rasberry seeds, or you could do it in a normal blender and just have little seeds, like jam.

Wednesday, June 16, 2010

Chainsaws and Sugar Free Juice Pops

Isaiah has found a new toy, a very LOUD toy, it makes a noise that makes you feel like someone is sawing down a tree right next to you. He lives for this toy. In fact he loves it so much that he has been sleeping with it the last couple of nights, tucked under his arm like a stuffed animal. Should I be worried? Not only does he sleep with it, it also goes everywhere he goes.... to the store, to eat, outside to cut down trees, and to Seven Peaks.

The second thing thing that Isaiah has been loving is juice pops, although not as much as the chain saw (he hasn't tried to sleep with one yet). They are so easy and I feel a lot better giving him that then a brightly dyed corn syrup pop. I forgot about these wonderful little treats, until my friend reminded me the other day of them. She was on bed rest and had me pick up different juices to make Popsicles. So I followed suit and bought a huge gallon jug of apple cider. It has made the best apple Popsicles. I bought the Popsicle molds at Target, or one of those chain stores last year I don't remember which, but pretty much everywhere has them.

Juice Pops

Your favorite juice
Popsicle Molds

Poor the juice into the molds and freeze.


Friday, June 4, 2010

My Favorite Sauce on Polenta


I tried this recipe because Mr. Italy himself, Mario Batali, created it. It quickly became my favorite right after I tasted it. Since then I have made it a number of times. Usually I play around with recipes and add to or take away ingredients, not this one, I stick to it like a loyal friend, and like a loyal friend it never lets me down.

Spaghetti Sauce
1/4 C olive oil
1 onion
4 cloves garlic
3 T thyme
1/2 carrot
2 cans, 28 oz., of whole tomatoes (I don't know how many bottles jars of tomatoes that would be)
Dash of red pepper

Heat olive oil, saute the onion and garlic until onion is soft. Add thyme and carrot, cook about 5 more minutes until the carrot is soft. Add tomatoes and juice of tomatoes and bring to a boil, stirring often. Lower heat and simmer 30 minutes util sauce is as thick as hot cereal. Season with salt and pepper.

Naturally Sweetened Chocolate Cake with Whip Cream Frosting


I made this birthday cake for my friend's daughter. My poor friend is on bed rest and can't do anything but lay on her side. She asked me to make a birthday cake for her daughters birthday, as a surprise. I was honored to make it. My friend eats only whole grains, and natural sweeteners. So this cake of course was made with natural sweeteners, and whole grains. The cake itself was very rich, and had an intense dark chocolate flavor. To lighten it up I added marshmallow frosting in between the layers, and topped it all with a chocolate whip cream frosting. What baked good doesn't improve with a little frosting? Making frosting without refined sugar can be kind of a trick to get the right consistency. Luckily I found two frosting recipes that fit the bill. The marshmallow frosting is from elana's pantry, and the whip cream frosting is from 101 cookbooks.
Looking back I think the cake would be a little bit better as a sheet cake, under baking it slightly so it is still moist. I think I slightly over did the baking trying to make sure that it was done all the way through. Also the whip cream frosting tends to separate when you add the dark chocolate so make it right before you are going to serve it, or add cocoa powder, instead of dark chocolate so that it won't separate. My friend also thought maybe you could mix all of the ingredients for the frosting, chill all of them, and then try whipping it, so that it wouldn't separate, who knows it's worth a try.

Below is the chocolate cake recipe from 101 cookbooks with my adaptations:

Chocolate Cake

2 1/2 cups whole grain flour ( I used kamut)
3/4 C cocoa powder (make sure this is quality because the taste affects the cake)
1 T baking powder
3/4 tsp sea salt (fine grain)
1/2 C barely melted coconut oil
1 C agave (or maple syrup)
2 eggs
2 tsp vanilla
1 C coconut milk, room temp.
1 dark chocolate bar finely chopped, (mine was 3.5 oz), she uses 8 oz.-(that is a lot of chocolate)

Preheat oven to 350 F with a rack in the middle of the oven. Grease and flour 2 round cake pans. Sift the flour, ,cocoa powder, baking powder, and salt in a large bowl.
In a separate bowl whisk together the coconut oil and agave or maple syrup. Whisk in the eggs, vanilla, and coconut milk. Pour the wet ingredients into the dry ingredients, stir to just combine, DON"T overstir. Fold in the chopped chocolate, gently. Pour into the baking pans and bake for 30-40 minutes. Take out when a tooth pick comes out clean. If doing a sheet cake slightly underbake it and pull it out when a tooth pick inserted still has a few crumbs that stick to it. Let cake cool COMPLETELY before frosting it or trying to get it out of the pans.

Frost the in between the layers with marshmallow frosting (recipe below), and cover the whole thing with chocolate whip cream frosting, top with fresh berries.

Marshmallow Frosting

2 egg whites
1/2 C agave

Whip the egg whites until they form stiff peaks with a hand mixer on high speed. Once the egg whites have formed stiff peaks, pour in the agave in a slow drizzle while beating. The frosting keeps for 48 hours in the fridge, but it will separate, in that case beat it again until it comes back together.

Chocolate Whipped Cream Frosting

(taken from 101 cookbooks)

2 ounces bittersweet chocolate (chopped)
1/4 cup unsalted butter, room temperature
1/4 cup maple syrup
1 cup heavy cream, whipped to stiff peaks

To make the frosting melt the chocolate in a double-boiler, or in a bowl placed over a pan of boiling water. In a medium bowl beat the butter until smooth and fluffy. Beat in the maple syrup. Then add the melted chocolate. Stir until silky smooth - any flecks of butter should be melted. Pour the chocolate mixture over the whipped cream and fold the chocolate into the cream. Keep going until the chocolate is well incorporated. Use an offset spatula to frost the completely cooled cake. If the cake is at all warm, the frosting will weep and melt. It still tastes good, but isn't what you're after.

Makes one 8x8 or 9x9 cake.